Posted April 1 (almost) 2003
For real information about real rockets please check out aRocket, the premier Internet source of amateur rocketry information.
This rocket is an experimental design that uses non-traditional materials. Polyacrylonitrile fiber was used because it provides a measure of structural stablilty. The body of the rocket is constructed of extruded polyacrylonitrile fibers that have been formed into continuous strands. Loops of polyacrylonitrile strands are linked into a nonwoven fabric.
The fins are constructed of the same material in a contrasting color. They are attached to the body as the body is being constructed. Loops from the inner edge of the fin are interlinked with loops on the body.
| |
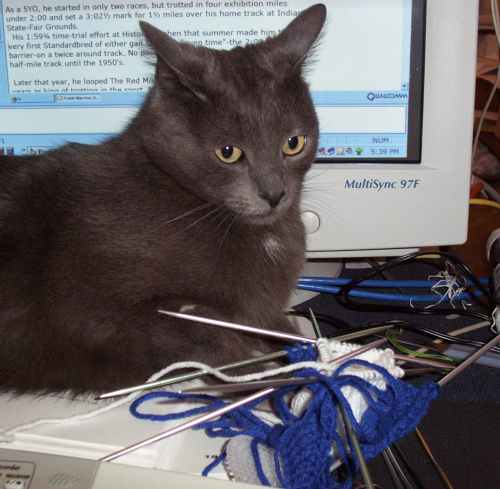
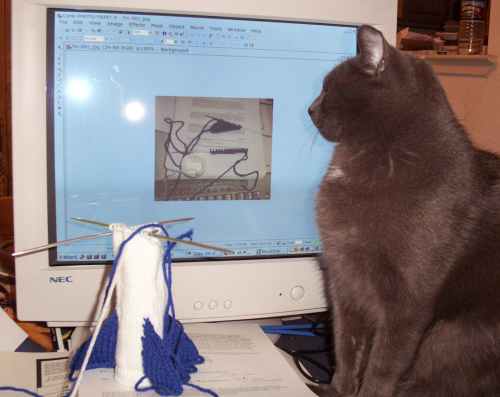
The Project Manager, Dr. Samuel Katz, inspects fin placement on the rocket. He seems a bit annoyed about something. |
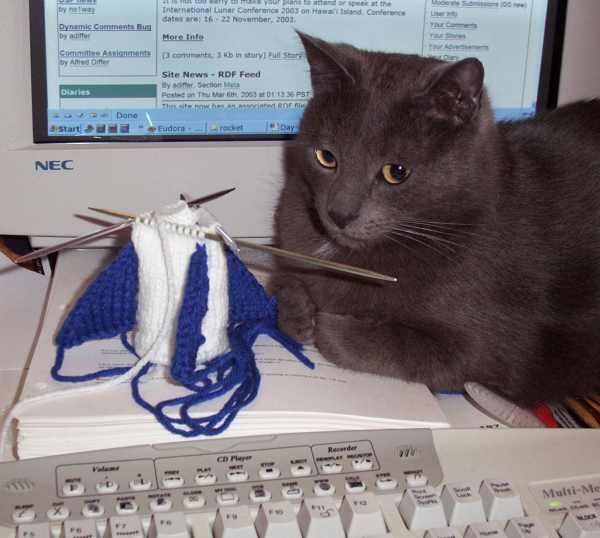
| Dr. Katz appears to have been reading Frontier Files Online while he was working. |
| | Dr. Katz checks the work in progress with the design specifications. He has informed the construction crew that more catnip is necessary. |
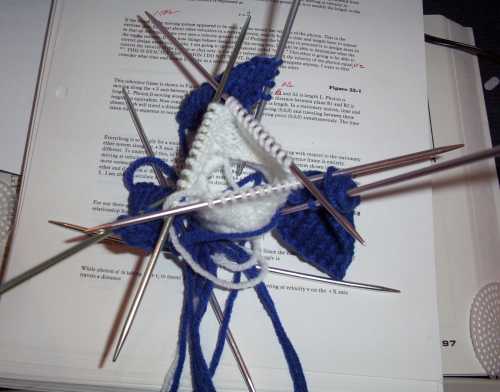
This is started at the bottom and worked upwards. I crocheted 33 stitches around a 2 inch plastic ring to begin. I joined the last stitch to the first with a slip stitch and crocheted 33 half double crochet stitches around. The plastic and crochet form a stable bottom for the rocket. You will need a lot of small DPNs, I think at the worst of it I was knitting with 11 size 3s. There were 6 or 7 holding the body stitches, one for each fin and then one to knit with. It looked awfully silly.
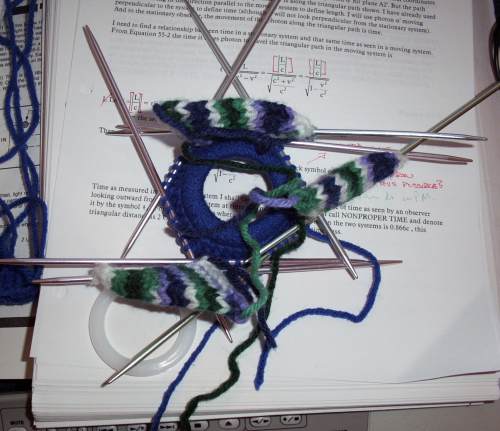
When I knit wearable stuff I prefer to use natural fibers. Most synthetics just don't feel right to me. Soft toys like stuffed animals can be made from soft synthetics. I've never been fond of Red Heart Yarn for anything except toys that do not need to be soft; this is not a soft cuddly yarn. (You could probably knit a barbed wire fence from it if you were so inclined.) RH is about the best yarn for a rocket because it is stiff and unyielding. I used smaller than usual needles and hooks for this because I wanted a tight gauge. The crochet was done with an E hook, the knitting on size 3 double points. On the white rocket I got 7 stitches to the inch! That takes some doing with Red Heart yarn but the fabric is firm and seems to hold its shape pretty well.
The fins are knitted separately and attached as the lower part of the body is worked in stockinette knit stitches. Cast on 17 stitches (or an odd nuber of sts that will give you an appropriate-sized fin) and purl one row. Be sure to purl the first stitch, in the following rows the first stitches are slipped. Knit 7 stitches and then make a centered double decrease, knit the rest of the row. Purl back. Knit the next row placing a centered double decrease in the center of the row. Continue until there is one stitch on the needle. Leave a long tail of yarn because this tail will make the loops that attach the fin to the rocket body.
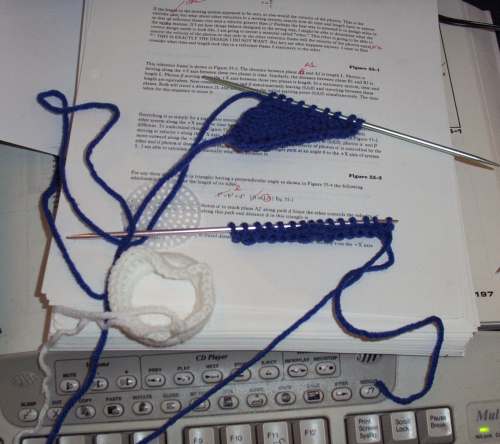
Fold the fin along the centered decrease line, gently sew the botton closed. Take the long tail of yarn and with a crochet hook pick up 8 loops along the side of the fin. Be sure to get the loop through each side of the fin. Place all the loops on a double point knitting needle. Make two more fins.
There should be 33 stitches (or 36 or a divisible by 3 number that completely covers the ring) on the plastic ring. Knit up one stitch in each of those crocheted stitches. Place them on double point knitting needles. Because of the rigidity of the plastic you will need to use 6 needles around. To help keep things straight alternate 5 and 6 stitches per needle for a 33 stitch body. Knit one round.
Now start attaching the fins to the body. From the first DPN knit one stitch. Now place one loop from the fin onto the first DPN; make sure you get the loop at the bottom of the fin. The bottom is the sewn together edge. Knit that loop together with the first stitch on the needle. Attach the other two fins in the same way, with 11 stitches between them. Continue attaching the fins working a loop from the fin with a loop from the body on every other row. Switch from 6 DPNs to 3 when you can comfortably get 3 needles around the body stitches.
Knit plain for several inches after the fins are attached until the rocket is as tall as you want it. Then start the taper for the nose cone. Decrease 3 stitches evenly around, knit a plain row between decrease rows and when you have 3 stitches left break off the yarn, thread it through those last stitches and fasten off.
The base of the rocket needs to be fairly flat and stable. I think a circle of plastic canvas would work. Cover it with whatever yarn you used for the fins or body and attach it to the stitches that cover the plastic ring. There needs to be something inside so the body will hold its shape. Standard polyester fiber fill is fine if you intend to allow a small child to play with your rocket.
Flight testing will be performed by a very cute Small Human who will not be named because this is the big Internet.
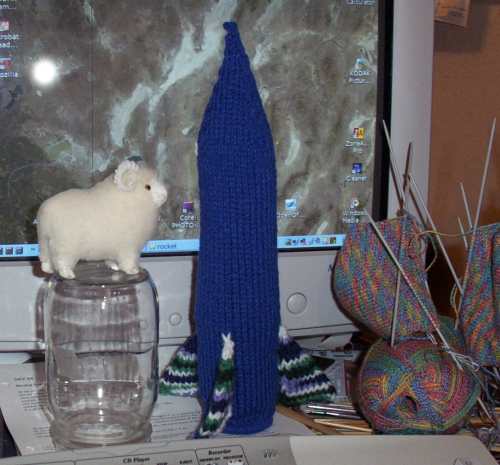
The finished rocket is shown against the wallpaper of my computer which is an aerial photograph of Black Rock Desert.
What sort of fuel does one use in a knitted rocket? A friend suggested sheep dip, but this is not made from wool. The yarn may well be made from sheep dip, though. On the other hand there's always Sheep Dip.
Home Knitting Spinning Amateur Radio Music Soap Links More Links Fiber Links Fun Stuff Email me